CONTRIBUTING
Creating links (Edges) between nodes:
1. Right click on first node
2. Right click on associated node
Note: If this is your first contribution during the session, you will be asked
to enter a username and given a password. Remember this password for
future sessions. If you have already contributed connections and
commentary using this username during previous sessions, you will be prompted
for the password.
3. Enter connection title
4. Enter commentary
5. Enter associated web URL (either http:// or www.)
6. Click submit to submit entry to database
7. Click cancel to cancel entry
8. After making all contributions for a specific session,
click “Save” button in bottom right hand corner of the interface to permanently
save the linked edged and commentary to the database.
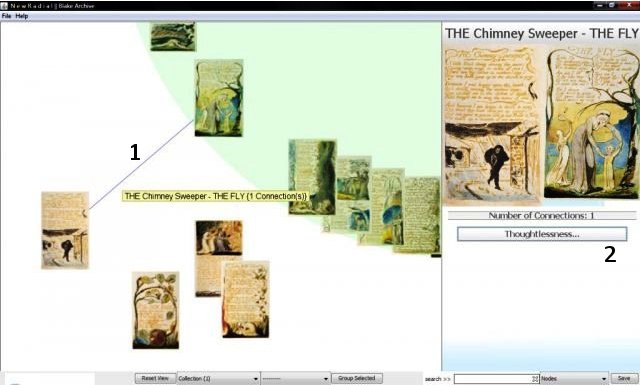
Fig. 1 - The connection between "The Chimney Sweep" and "The Fly" appears as a
line (1) connecting the nodes. More information on the connection is
available in the sidepane (2), as well as the total number of
connections made between those particular nodes.
Note: A connection can only be edited/removed by the creator.
Creating Groups
1. Move/drag the nodes that you want to group together to a
space in the visualisation field.
2. Left-click + drag to draw a box around the group of nodes
3. Click “Group Selected” button at the bottom of the
interface
4. Enter group name in sidepane
5. Enter comments in sidepane
6. Click submit to submit entry to database
7. Click cancel to cancel entry
8. After making all contributions for a specific session,
click “Save” button in bottom right hand corner of the interface to permanently
save the linked edged and commentary to the database.
Note: Once a group has been saved, it can be accessed through the bottom
toolbar through the drop-down menu beside the “Group Selected” button.
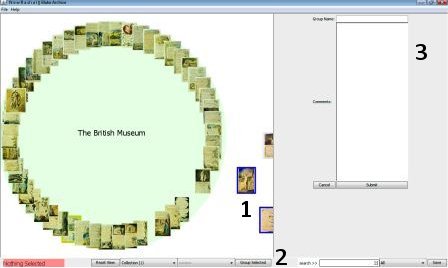
Fig. 2 - After selecting the desired Nodes (1), click “Group Selected” (2) and add a name
and comments in the sidepane (3). Click Save to keep your work on file.
Back to Key Functions and Commands
Back to Table of Contents